In this article for Game World Observer, ZiMAD artist Andrey Novikov shares his insights on how to interact with AI tools and explains which parts of the work can be delegated to them without compromising quality.
Andrey Novikov
When I began my career in design, the market offered significantly less software to choose from, and the available tools were very limited at the time. And even though we now have as much monotonous work, the constantly developing tools help us alleviate it.
That’s why it’s so important to keep learning. Always. Currently, I use Photoshop with built-in AI and Stable Diffusion (together with multiple tools for artists) in my work.
I started learning the latter through manuals I found online. I couldn’t download all the files I needed in one pack back then. My knowledge wasn’t systematized, so I even decided to finish a course on Stable Diffusion.
Would I advise doing the same?
Sure. Though being a pioneer is honorable, having an opportunity to learn from an expert who is ready to share is so much more convenient. For example, a course can shorten your journey from two weeks to two days: it will provide you with all the info you need and the basic knowledge, using which you can start working with a new tool right away.
Stable Diffusion is set up locally on your computer: you need to install Python, run the compiler, get a link, and follow it to open the web version of the interface.
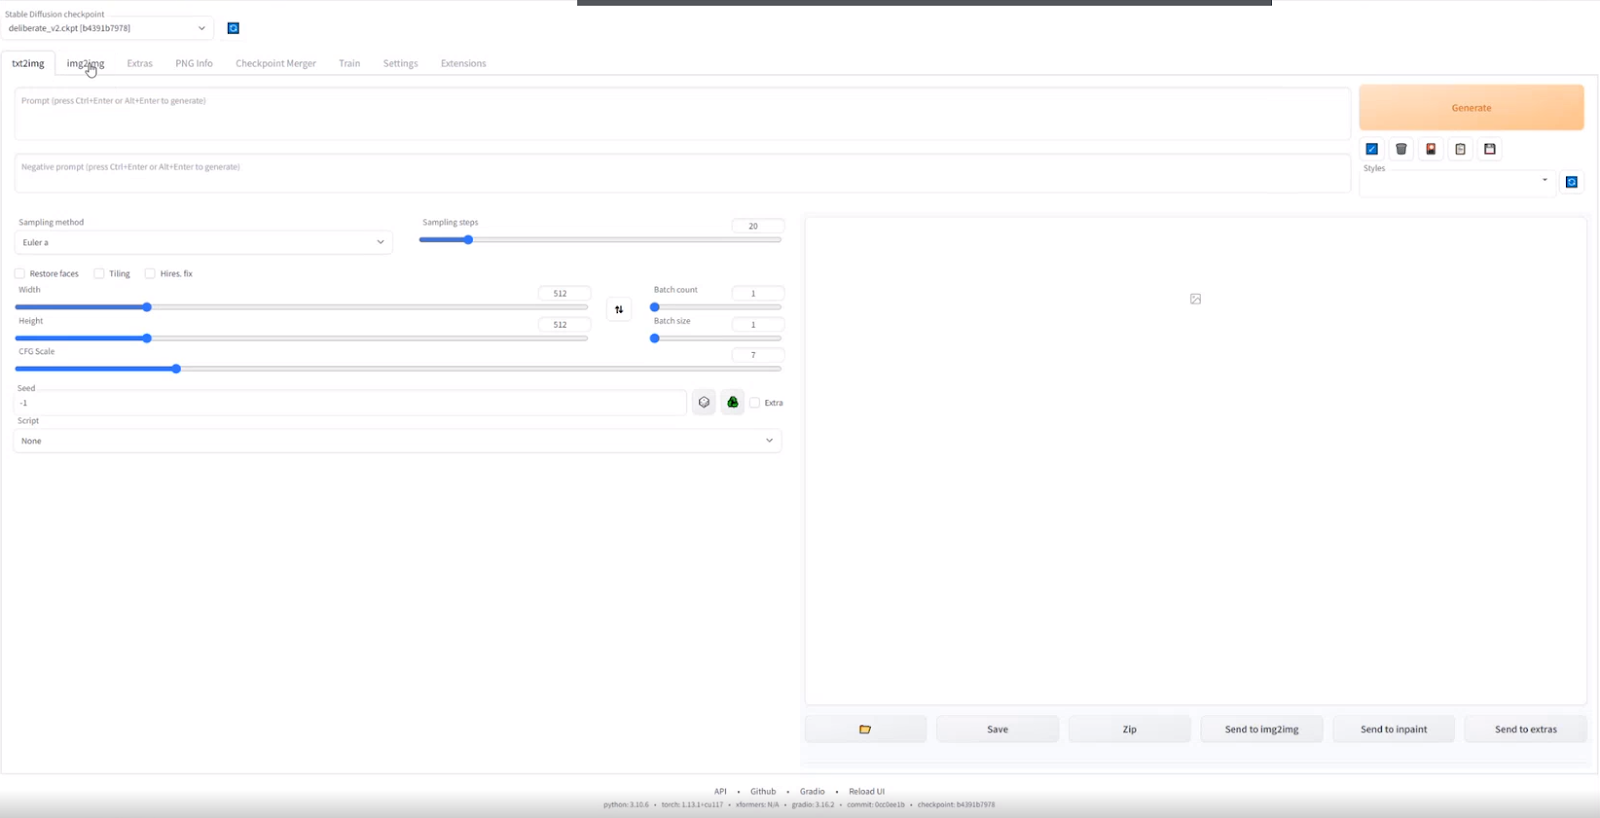
However, you can use other interfaces — the choice is up to the user. Stable Diffusion features multiple settings, and it’s important to know how each of them works. They are not the usual buttons in Photoshop, where you can figure out what a tool does by its icon. Alternative interfaces include Easy Diffusion, Vlad Diffusion, and NMKD Stable Diffusion GUI.
AI provides the result almost instantly — it’s not rendering that gives you enough time to go to the kitchen and have a chat with colleagues by the cooler. To work with AI fast, it needs to be set up for your goals.
AI training
Smooth work with AI is the result of training.
For example, I needed the model to be able to generate an interior in a specific style. To do this:
- I took pictures of one of ZiMAD’s projects, Puzzle Villa;
- Cropped them into smaller segments so that each fragment featured an element of interior design;
- Let AI interpret what it sees in the pictures — at this stage, it’s important to estimate the accuracy of data and fix it, if needed (if you skip this step, the network will keep generating incorrect results: e.g, if it mistakes a dresser for a person, what will it give you if you ask for a dresser? — correct, a person);
- After the training process, you end up with a distinct style.
You can also share it with your colleagues to make your images consistent. They only need to have a specific key to control or adjust the behavior of AI algorithms.
So here’s the process of working with AI in a nutshell:
- Show the AI tool 50+ images, describe them, and get a new style;
- Apply the style to the images that require modification;
- The illustrator works on the details.
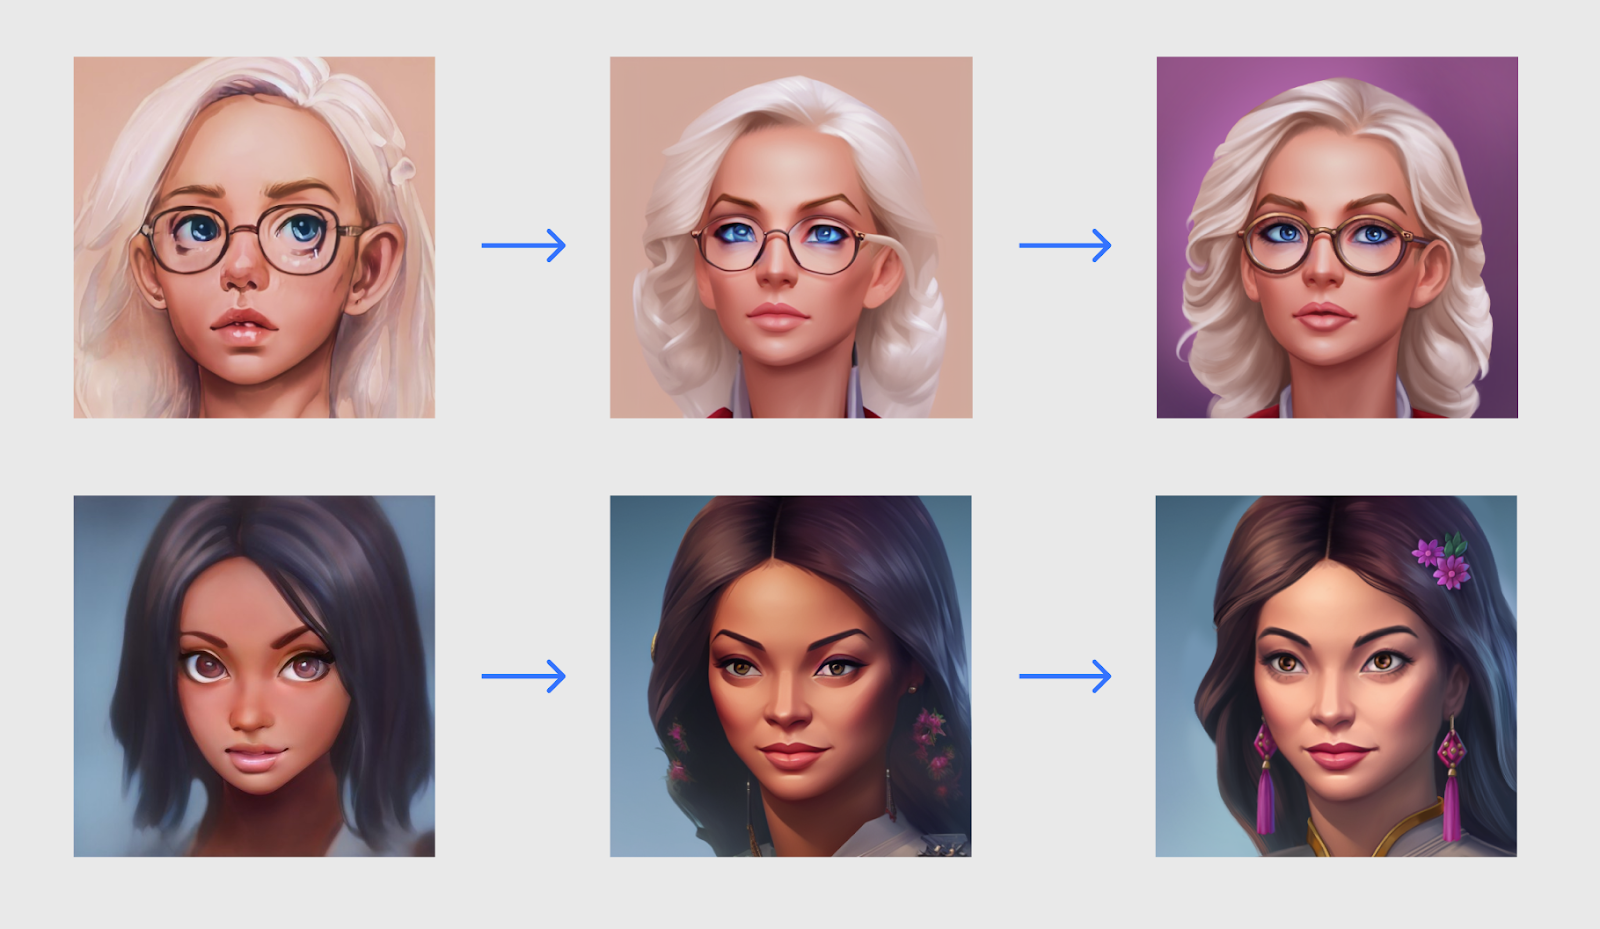
1 — initial image; 2 — styled image; 3 — image reworked by an illustrator
Prompts: key to interacting with AI
If you want to get great, high-quality results from working with AI, then learning how to work with prompts — text inquiries — is a must for you. They must be formulated as precisely as possible.
Each prompt is unique, and any little thing can affect the result, so it’s highly important to follow the correct word order and use words and styles carefully.

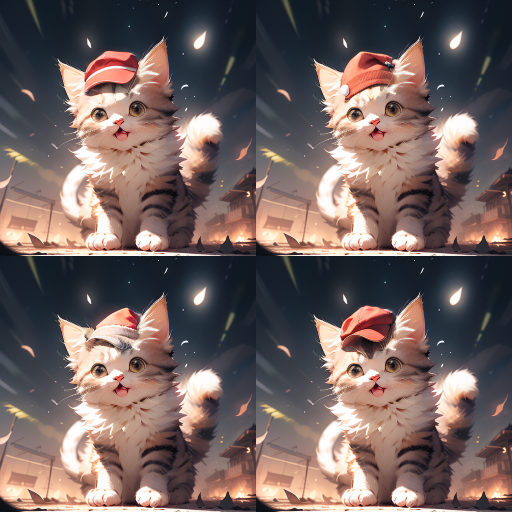
I don’t recommend using only prompts. You can throw images at AI, which, personally, is easier for me than explaining something through a text. Let’s say, I need a picture of a specific cat.
I send AI the cat and tell it I need a cat in a hat. But the chances the AI will give me what I want are close to zero. To boost the process, I can make a sketch of a hat in Photoshop, send it to AI for processing, and adjust such settings as the number of variations and the level of details.
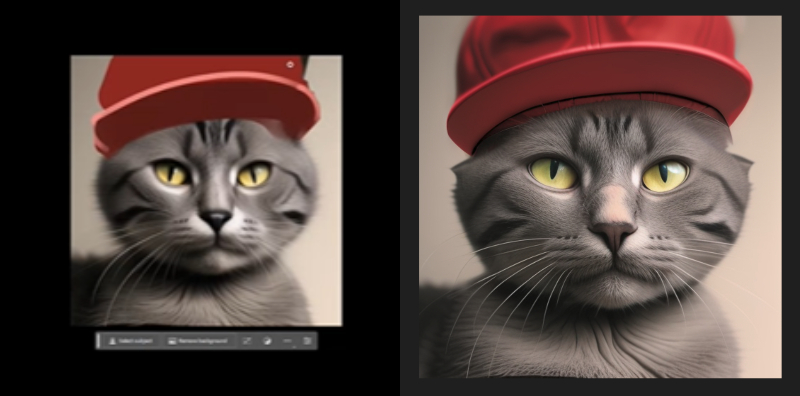
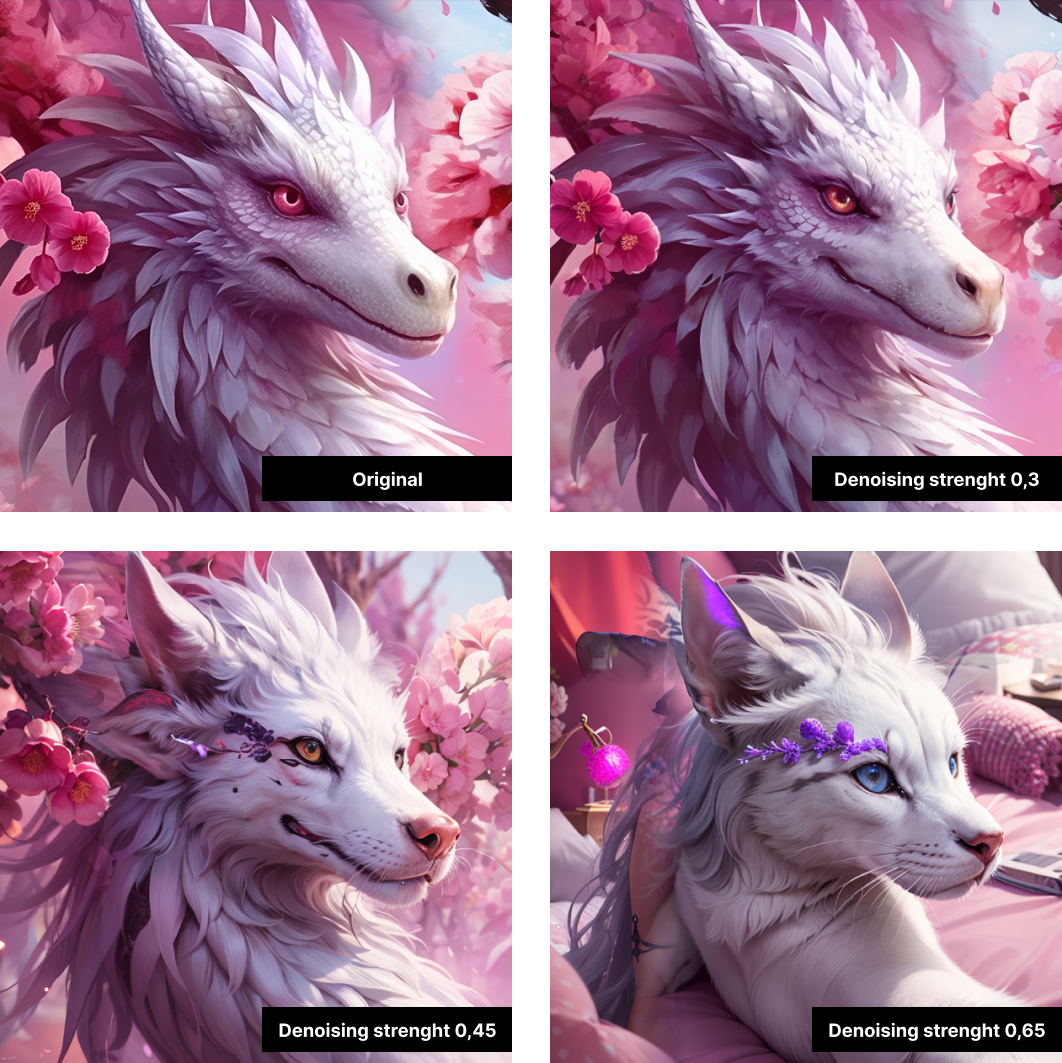
I select the area for AI to work with using the Inpaint tool and adjust the required settings like the number of variations, the level of details, and the most important setting in this case — denoising strength that defines how much AI will stick to my sketch, where 0 means it will not make any changes at all and 1.0 means it will ignore my sketch and draw whatever it wants.
After that, I get several variations of the cat in a hat, and I choose the one that I prefer.
Here is another example of using AI to significantly speed up certain work processes.
A 2D Artist needed to create a unique UI for an event. The artist made a sketch, I ran it through AI and described all the details provided by the artist in a prompt. After that, we instantly got a perfect basic picture to work on.
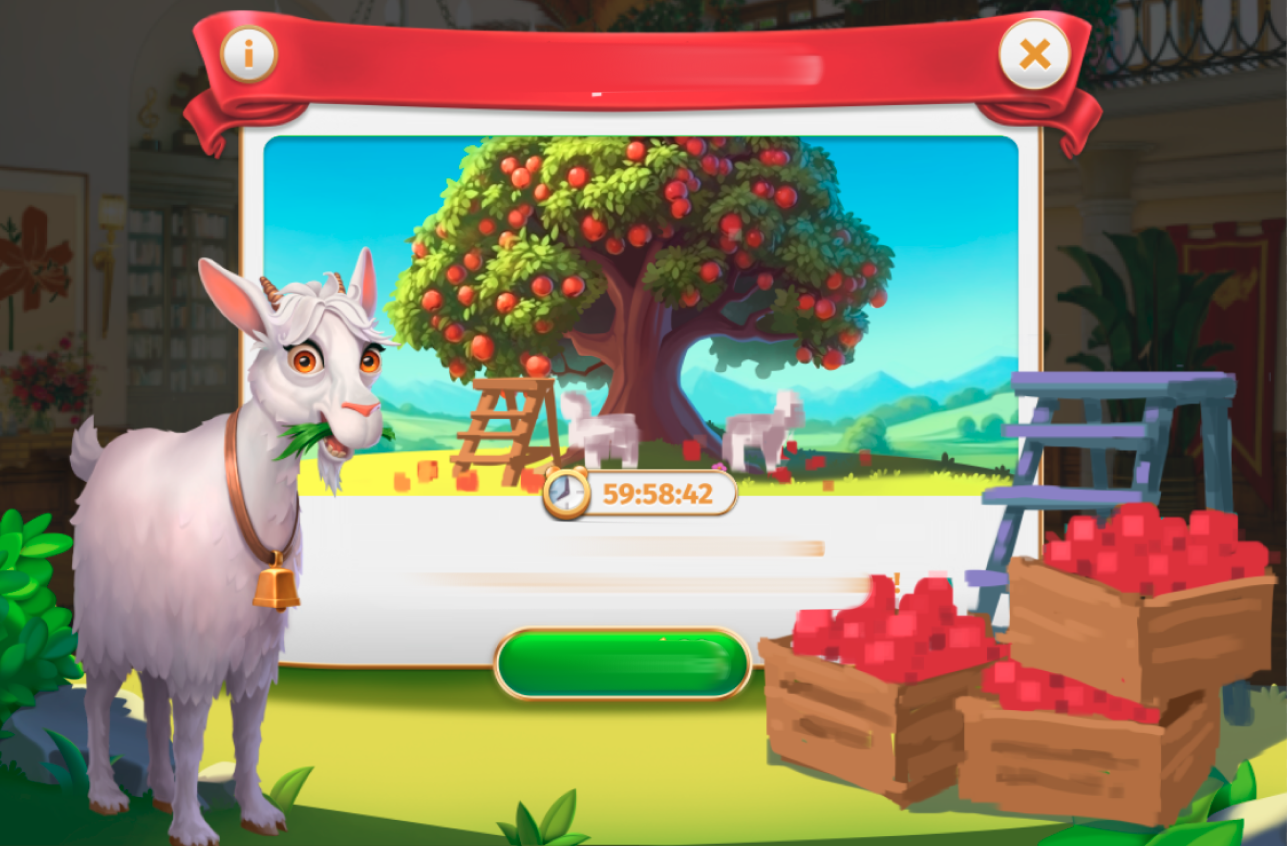
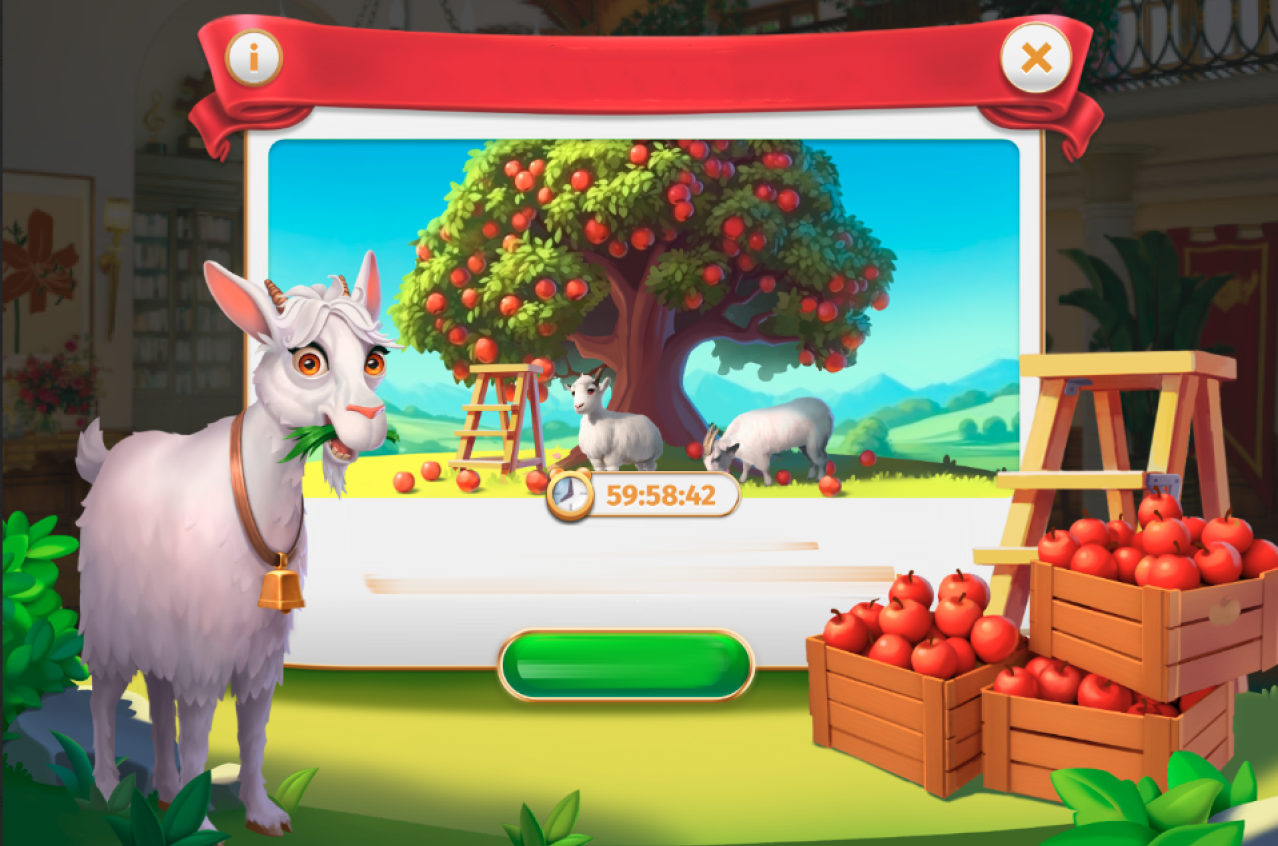
Boxes with apples, stairs, and sheep in the picture were generated separately to receive a more predictable result suitable for further reworking.
Another powerful direction of work is joining 3D graphics and AI. Right now, I have tasks for generating certain small locations. AI works well with interiors, but perspective sometimes fails. In my case, I need a specific angle, so here is what I do.
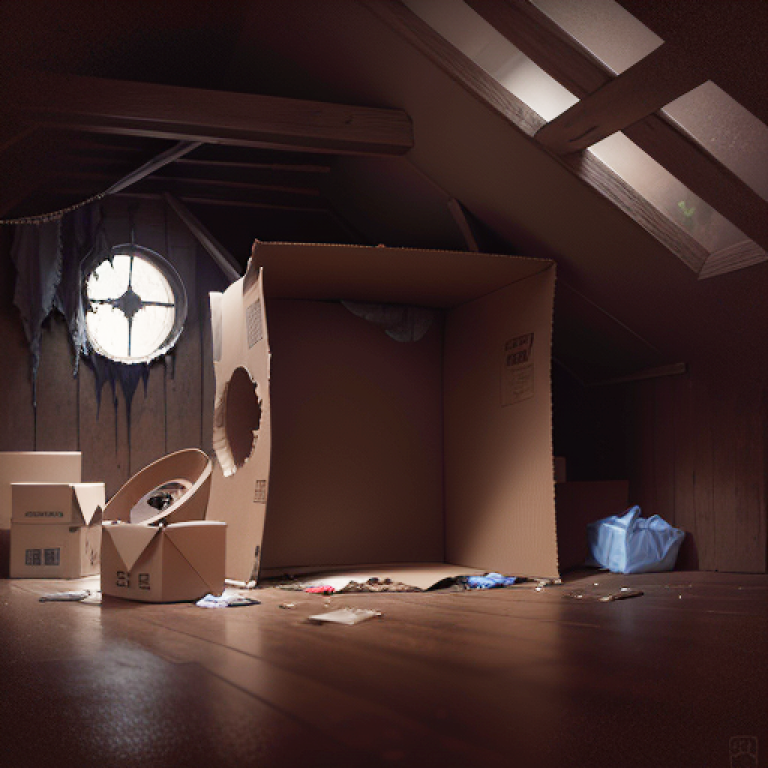
First I model a scene in 3D, arrange the objects around the scene and position the camera, render the depth map, and get the following image.
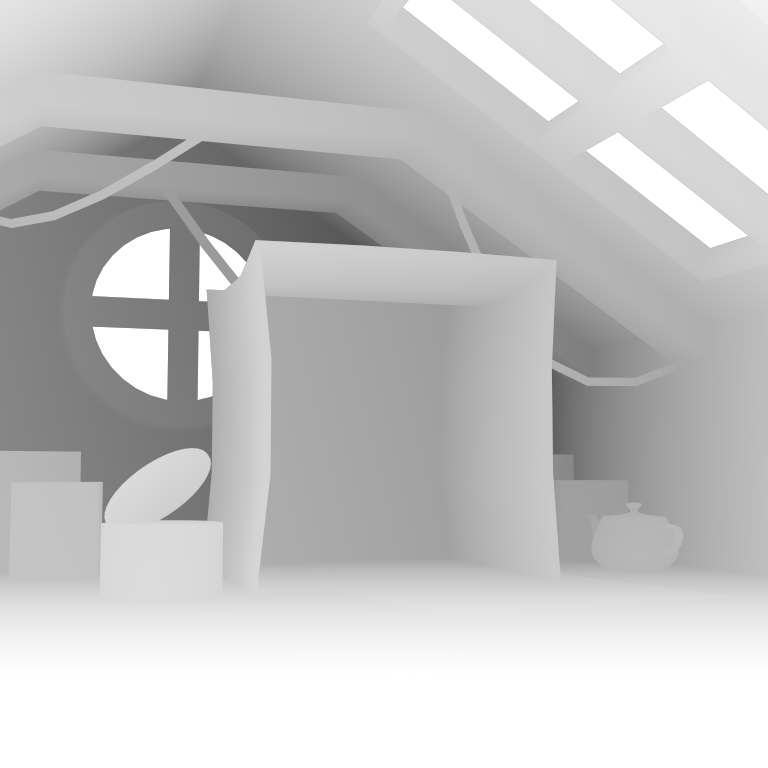
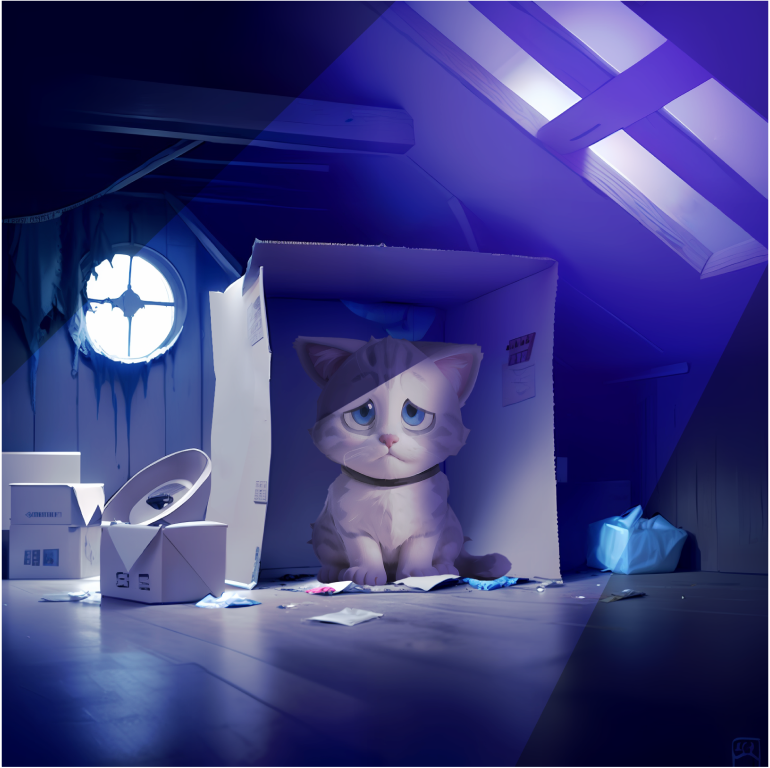
The second step is to upload the depth map into a special section called ControlNet, set the settings so that the neural network generates images based on this particular depth map preserving the angle and location of objects. Then I describe a dark, cluttered attic, with a skylight and a cardboard box in the center of the frame in a prompt, and I get the following image.
After that, I finalize the atmosphere in graphic editors based on the technical specifications. According to the description, I should end up with the image of a sad cat asking for help while in a dark, scary attic on a rainy night during a severe thunderstorm. I get an image that I can pass on to the animator for further work.
Value of AI for artists
AI tools help create basic images that you can polish as you wish, focusing more on the picture rather than on technical work.
In the past, if I had to draw 20 avatars, here’s how the process would go:
- Looking for references;
- Drawing sketches;
- Working on each avatar individually from scratch;
- Gradually adding details to each avatar.
Now AI does most of this work for me, and it’s much more effective and faster.
Once the style of the project is ready, it usually takes me only 5-7 minutes to generate 20-30 options of a game avatar to choose from. Generating 10 avatars with the same number of options takes about an hour.
In general, I really like how AI is integrated into my working processes. With AI, I can complete more tasks than I used to when I worked only with a graphic editor, which makes AI a great tool. But it’s still a tool and not a magic button that threatens to leave artists without work.
Different AI tools perfectly compliment each other. For instance, Stable Diffusion works better with casual graphics, and Photoshop is great for realistic images, and its built-in AI is quite handy as well. However, its results are not as predictable as in Stable Diffusion because there aren’t any settings apart from prompts.
For example, if you have an interesting image that cannot be cropped as you wish, you can draw the missing part right in Photoshop very quickly. In Stable Diffusion, such a task requires more effort.
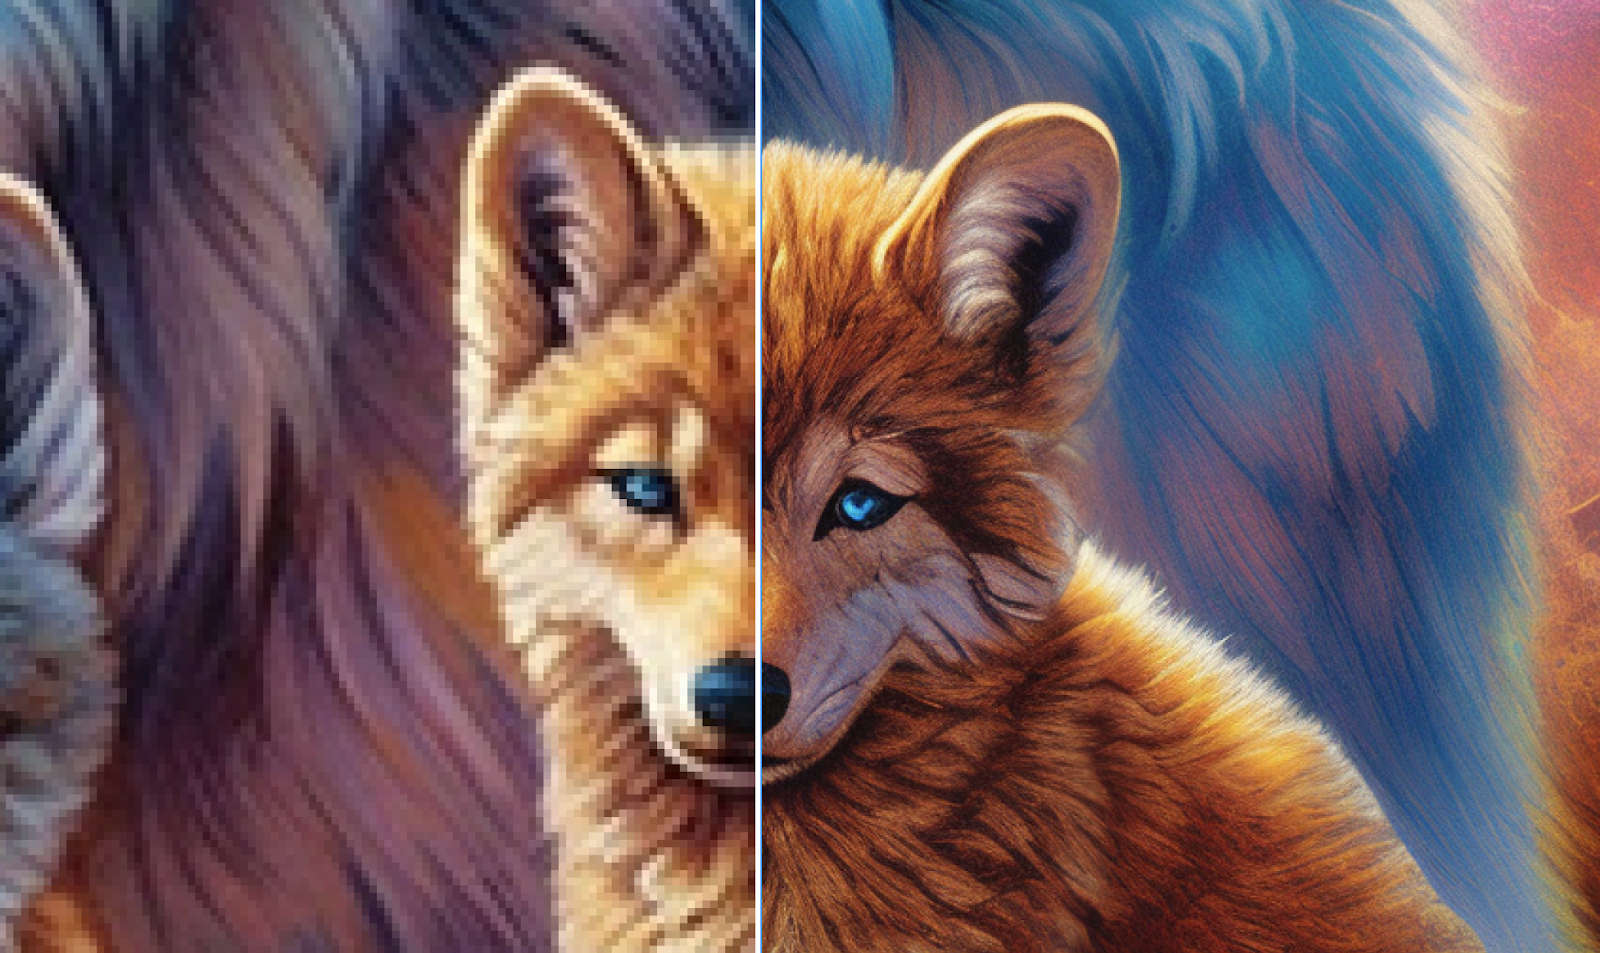
Midjourney can create amazing fantasy pictures, but, unfortunately, their resolution is far from decent. That’s why at ZiMAD, we use Stable Diffusion to increase resolution. The coolest thing about it is that it offers an option to leave the image untouched, while improving its resolution and adding some details, if needed.
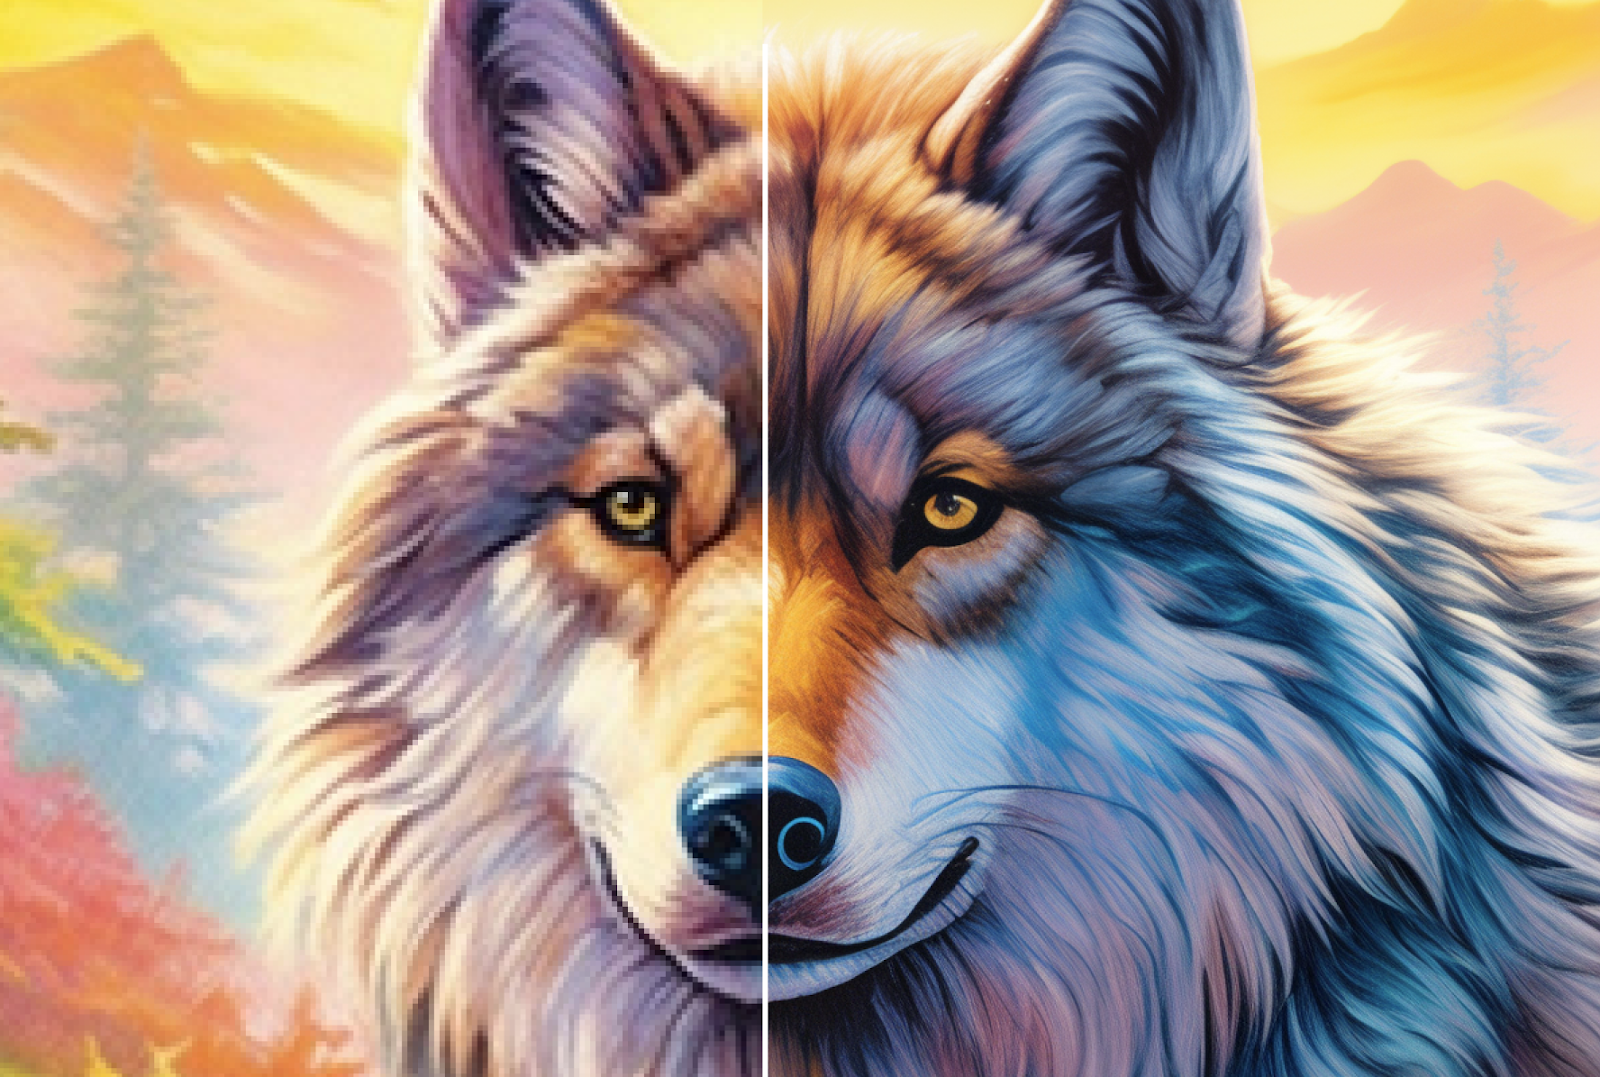
My colleague used Midjourney to create a beautiful picture for Magic Jigsaw Puzzles, and I increased its resolution to 4K in Stable Diffusion. AI added details without changing the initial picture. The wolf got high-quality fur, and pixels were eliminated.
In such cases, I use the Script field. I select one of the proposed upscalers, in our case it is LDSR, set the Scale Factor parameter, which determines how many times the image will be enlarged. I also remember to set the Denoising Strength parameter to near minimum values. If this parameter is set too high, the neural network will seriously redraw the picture. The values for upscaling in our case are 0.1-0.2, here is an example of what happens if you leave a high Denoising Strength parameter when upscaling an image.
After setting a good denoise parameter, the neural network completed the details without changing the overall picture. For example, this is how the wolf got high-quality fur, and pixels were eliminated.
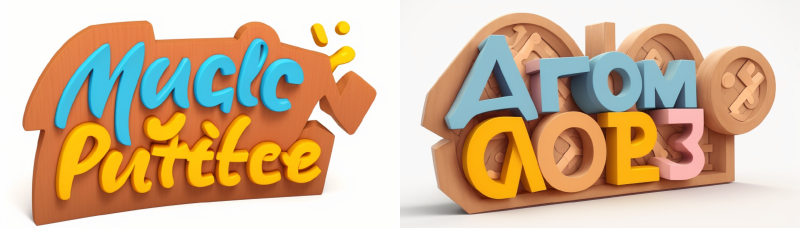
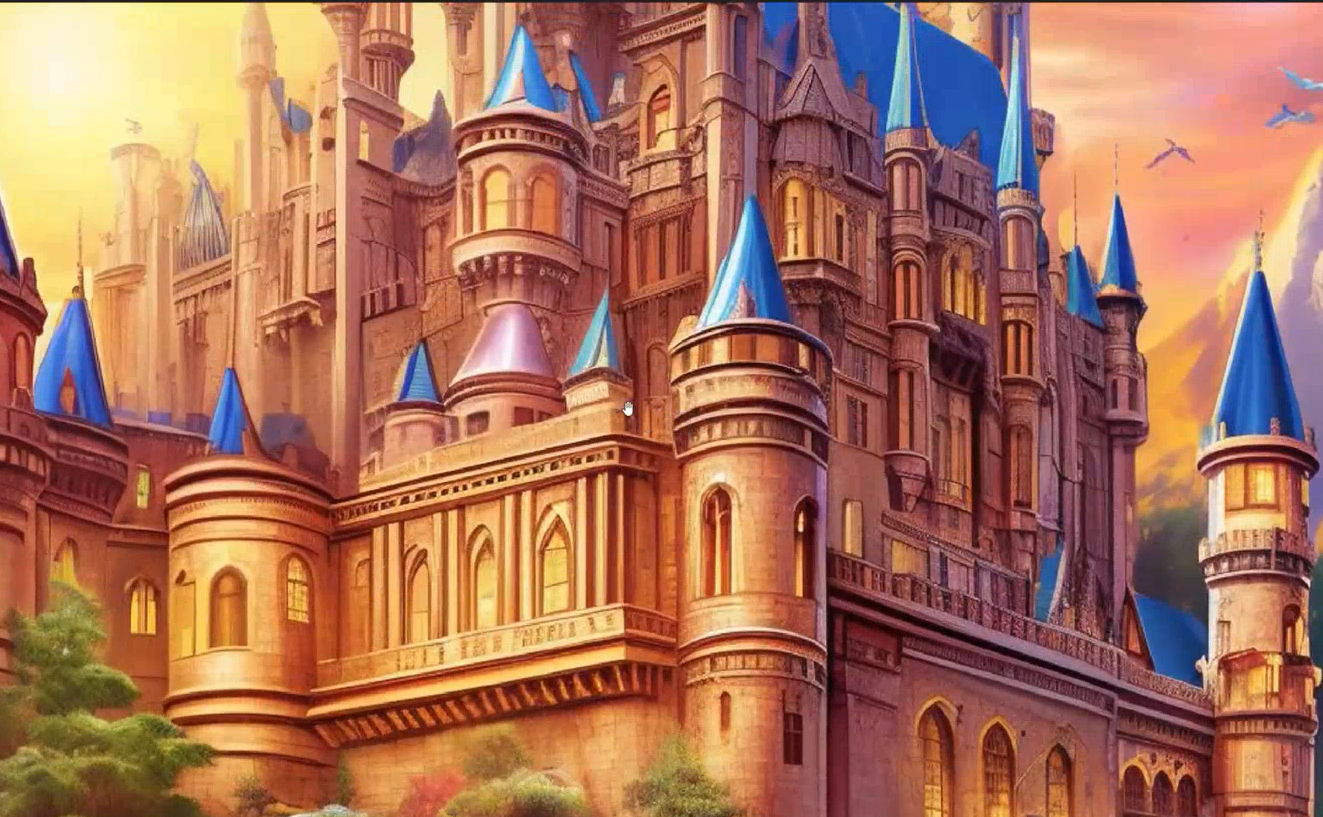
Even though Stable Diffusion works great with elements of nature. It still struggles with architecture and inscriptions. Buildings may turn out chaotic, and the text — unreadable. Here are some attempts to create a logo using AI.
Neural networks will keep getting more complex and provide more opportunities for quick and effective work with images. Implementing them into your work is vital for staying competitive.
In the near future, I’m planning to create a pack of 50 icons in Stable Diffusion. If I were to do this manually, it would take me over a week, while with AI I can complete this task in about two days.
The advantage is undeniable, isn’t it? So instead of resisting new technology, we should learn how to effectively apply it.